
Keeping your bird’s cage clean is one of the most important things you can do to maintain their health and happiness. But how often exactly should you be washing the cage? The ideal cleaning frequency depends on a few key factors.
You should clean your bird’s cage every 2 – 3 days for more than one bird per cage. A single bird needs Its cage cleaned once per week. You will find detailed instructions in this article.
Size of Cage
The size of your bird’s enclosure impacts how quickly waste, feathers, and debris accumulate.
Small Cages
Small cages and travel carriers need more frequent scrubdowns than large flight cages. A good rule of thumb is to wash small cages at least twice per week. The limited space and close quarters mean mess builds up rapidly. Even a single bird in a modest cage produces a lot of debris necessitating frequent changings of cage lining and disinfecting of bars.
With only 1-2 perches and a food cup plus water bowl crammed in tight, droppings have little space to disperse. The mess quickly piles up underfoot multiplying health risks. Likewise, scattered seed hulls and produce chunks won’t have room to spread making cleaning indispensable.
Washing small cages every 2-3 days keeps ahead of the filth curve before bacteria has a chance to bloom. When multiple birds share close confines, aim to wash the habitat at minimum every other day.
Large Cages
With plenty of horizontal space for your bird to flit around, droppings and discarded food spread out more. Large flight cages may only need cleaning once a week. Multiple levels joined by ladders and ramps means birds locomote vertically and roam farther horizontally.
Waste drops to the bottom rather than building up underfoot. A wider cage floor also helps separate eating zones from perching and playing areas also somewhat compartmentalizing the soiling.
Larger cages simply offer more real estate for multiple birds to occupy separate territories. More perches situated higher and lower gives everyone spots to claim minimizing skirmishes. Each bird also eats and snuggles into its own secluded nooks.
Obviously multiple birds still produce lots of messy debris. But expansive enclosures allow waste to disperse mitigating unhealthy build ups. Large enough cages can easily go up to 7 days between thorough scrubbings.
Number of Birds
It stands to reason that the more birds sharing an enclosure, the faster it gets soiled.
Solo Birds
A single small bird in a roomy cage may only necessitate cleaning once a week. Just one critter generates significantly less waste than a rambunctious flock. The mess accumulates much slower when you only have a lone parakeet shuffling around.
With a single parrot rubbing against cage bars, considerably fewer feathers cling to every surface. Just several poops dot cages housing one lovebird or canary versus dozens plastering the papers. Scaling up cage dimensions also helps by allowing the mess to spread out more when there’s no competition for the best spots.
Providing solo birds extra space prevents stepped on droppings and food everywhere minimizing health hazards. Solo pets also tend to be less stressed and feather pick less when granted more elbow room.
Multiple Birds
Houses with multiple birds should wash cages at least 2-3 times per week. With more birds flapping around, more feathers, seeds, and poop collect to potentially harbor germs. Having numerous energetic balls of feathers zooming around translates into rapidly multiplying disorder.
Two birds automatically double the debris versus a single pet. Bumping into one another mid flight or tussling over treats also scatters more mess. The more crowded the cage, the faster paper linerFloor substrate soak through or perches become dotted white and green.
Multiple birds also drink more, spreading water slosh over cage rims faster. Eating side by side drops food underfoot building hazardous muck. They grind pellets and produce creating crumbs doubling spillage buildup. Group living means sharing germs and mess which speed illness contagion without diligent cleaning.
Placement in Home
The spot where your bird’s cage sits also determines cleaning needs.
Heavy-Traffic Areas
Cages in busier family rooms or kitchens are exposed to more potential airborne debris and require more frequent scrubdowns than cages in back bedrooms. High foot traffic also runs the risk of germs hitchhiking indoors on shoes.
Common living areas experience the most hustle and bustle as folks come and go. Plopping your bird cage amid the daily commotion exposes the cage to everything stirred up in the air. Dust and dander circulate freely, coating cage surfaces and substrate. Windows and doors also frequently open ushering environmental allergens inside.
Drifting debris combines with cage mess exponentially accelerating accumulation. Birds housed in high traffic zones definitely need cages washed a minimum of twice weekly. Three times weekly cleans even better for mitigating health issues.
Living room or dens also tempt folks to share snacks while watching TV. Salty chips or sugary cookies leave oily fingerprints on cage bars your bird will nibble later. Air frying foods also launches grease on enclosure surfaces closer to kitchens. More activity demands more frequent cleaning.
Additionally housing bird cages on lower levels subjects their enclosures to chaos created by kids and pets. Little feet kick up plenty of existing floor crumbs and pet fur. Hyper dogs and cats also enjoy batting cages or nosing up to bars spreading saliva. Young children may accidentally leave fingerprints from messy snacks like yogurt.
Enclosed Rooms
Cages kept in closed-door areas used solely for housing birds may not need as many weekly cleanings. With less activity stirring up dust and debris, waste accumulates slower out of high traffic zones. Designating a single room as an aviary definitely proves advantageous.
Shutting out other household pets limits exposure to foreign germs and hair they track around. Closing vents or turning off central heating/cooling prevents air currents pushing environmental irritants around. Draw the curtains or blinds provides protection from drifting outdoor allergens.
Restricting kids from entering bird rooms also cuts down tremendously on stray debris and dangers. Clutter from toys won’t accumulate underneath cages when youngsters can’t access the space. Toddlers are also far less likely to grab cage bars transferring germy residue without adult supervision.
However even dedicated bird rooms require cage cleanings multiple times per week with the door closed. Birds molt feathers, flick food and poop prolifically regardless of location. But separating cages into their own closed quarters definitely stretches the duration between required scourings. Six days could safely pass between thorough cage wash downs for a single parakeet or canary.
Types of Substrate
Certain cage liners handle messes better than others between full cage changes.
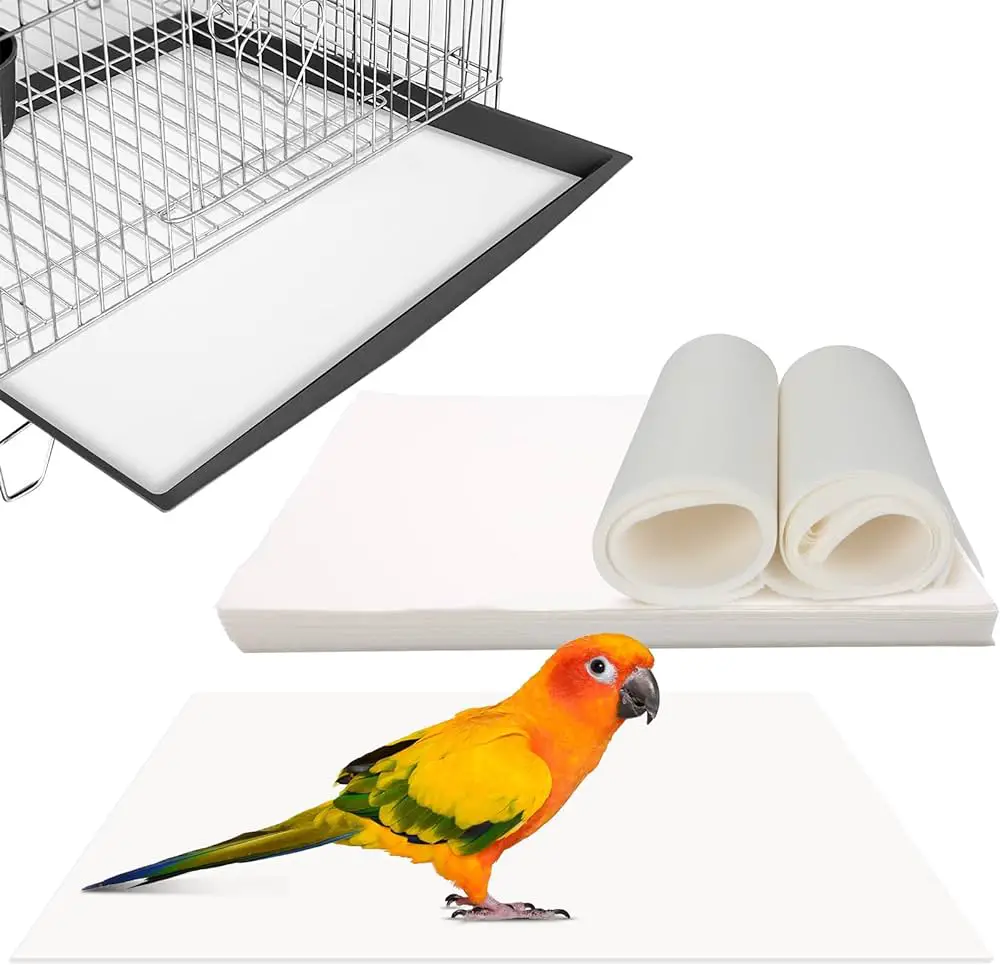
Paper
Paper cage liners clearly show droppings and food debris. They’re very porous, so liquids seep through quickly. You’ll need to swap paper 1-2 times per day. Newspaper traditionally lines many bird cages because of its accessibility. Families buying a bird seldom realize how problematic newsprint becomes once put to use on cage flooring.
At first glance newspaper seems a convenient solution for absorbing moisture. It lays flat providing solid footing and clearly displays waste for removal. But toxic inks and flimsy paper cause big problems when used inside cages long term.
Ink toxicity poses the first major hazard for cages lined with newsprint. Standard black inks utilize soy or petroleum bases with pigments containing heavy metals. As pages degrade, trace metals like zinc, copper and lead leech onto birds feet, wings and bellies. Heavy metal poisoning causes organ failure and neuropathy.
Porosity issues also plague newspaper. The thin paper substrate quickly saturates with liquids. Urine and watery droppings seep through newsprint rapidly spreading germs underneath. Once paper turns soggy,dangerous molds and mildews take hold.
Ruffled newsprint layers also conceal debris underneath until replacement. By the time top pages appear obviously soiled,lower layers already foster masses of dangerous microbes impossible to fully eliminate without cage disinfecting.
Reusable Fabrics
While reusable cotton cage liners conveniently handle multiple wash loads, they allow moisture to pool longer before changes. Bacteria readily grows on damp surfaces inside cages. Many manufacturers sell reusable cotton cage liners touting convenience and savings from washability. Cotton fabrics promise comfort underfoot during extended wear against tender feet.
The soft textured fabric does make a cozy cage liner base birds snuggle into. Natural fibers feel pleasant curling toes around and clutching during naps. Cotton also outperforms newspaper for moisture absorption thanks thicker fabric weave trapping liquid downward.
Yet reusable fabric liners ultimately enable perilous moisture retention long term. The very absorbency allowing cotton fabrics to contain multiple urine and dropping stains also breeds bacteria. Damp patches linger out of sight against cage floor bars slowly multiplying germs even between hot water laundry cycles.
Using fabric cage liners benefits from combining fabrics with more absorbent substrates during rotations. Adding daily paper layers draws wetness away from underlying cotton during peak times. Interchange fabric for completely sterile paper day and night to avoid protracted dampness against cage aluminum.
Corn Cob Granules
100% biodegradable corn granules absorb moisture well. Liquids don’t puddle on the cage bottom, minimizing bacterial growth risks. Replace corn cob twice weekly. Fabulous absorption capacity ranks corn cob bedding the best cage liner for controlling germ spreading moisture. Complete biodegradability also makes corn cob disposal easy without harming the environment.
What corn cob does lack is cushioning for tender feet. Adding a smooth fabric liner underneath provides padded comfort while granules handle absorptive grunt work atop. Corn also roughens metals speeding corrosion so placing cob directly against wire bases is ill advised despite wicking abilities.
Daily replacement is recommended as moisture eventually overwhelms corn cob too. But impressive absorption definitely buys bigger windows between complete cage scrubbings.
Pelleted Paper
Pelleted paper bedding made from recycled newsprint is very absorbent. The pellets rapidly soak up spills and dried poops. Replace pelleted paper 2-3 times per week. Paper pellets offer another great choice balancing absorbency and affordability. Drying ink during manufacturing helps reduce risks.
Binding shredded recycled newspaper into condensed pellets boosts structural integrity for repeated soaking.Like corn cob, the interlocking paper bits leave little space for fluids to pool in. Urine and droppings pass vertically down through paper chunks minimizing outward germ transfer.
An extremely budget friendly cage liner option, bulk paper pellets cost little to replace 2-3 times weekly. The high capacity wicking ability rivals fabric and corncob making paper pellets suitable for all cage types. Smooth rounded pellet shapes pose little risk of foot damage from prolonged direct contact either.
The only downside of pelleted paper is also shared by newspaper in trace metal contaminant risks. Ensure pellet manufacturers use purified processing methods to eliminate toxins. Otherwise great absorption for the price makes paper pellets the go-to economical soaking solution.
Health Conditions
Birds weakened by illness or injury need extra sanitary accommodations to prevent worsening health issues.
Challenged Immune Systems
For birds battling mites, infections, or malnutrition, wash the cage thoroughly every 2-3 days maximum. Germs can quickly overwhelm their already taxed immune defenses. Sick and injured birds already endure plenty stress without piling on preventable hazards from dirty surroundings. Taxed immune systems desperately require clean safe housing for the best chance of full recovery.
The tiniest traces of molds or bacteria multiplying inside messy cages readily overpower their tentative hold on health. More frequent hot water disinfecting kills developing germ colonies before they expand enough to cause real harm. Clipping the growth cycle also curtails transfer to other pets.
Meticulous cleaning protocols make all the difference keeping illness from spiraling into life threatening crises. Allowing disorder to fester even a few days could prove devastating for an ailing bird. Be vigilant about sticking to routine cage washing along will providing disease appropriate treatments the moment symptoms appear.
Injuries/Surgery
Clean cages daily for recovering birds sporting injuries or post-operative incisions prone to infections. Do not allow droppings, feathers or food debris to cake onto healing wounds. Healing wound tissue cannot protect against contaminants soiled cage environments expose recovering birds to. Open incisions offers zero immunity to randomly falling feathers carrying microbes or waste bits stuck to scabbing skin.
Therefore birds healing either unexpected trauma or intentional surgeries need the ultimate protection that pristine housing affords. While wounds mend externally, immune responses remain hindered internally obligating external support systems to pull more weight. Maintaining meticulously clean cage conditions takes pressure off slowed systems buying precious time for strength restoration.
When feathered companions require rehabilitation time, rise to the responsibility by guaranteeing flawless cage conditions. Resist cutting corners presuming usual cleaning routines suffice post crisis. Your bird implicitly trusts your capability when unable to fully care for itself. Uphold that surrogate parental duty through ensuring comfortable, safe housing each day of convalescence.
Supplies Needed
Having the proper cleaning gear makes washing bird cages far easier. Below are the must-have supplies:
- Mild dish soap
- Bucket or sink basin
- Small scrub brush
- Paper towels
- Disinfectant cleaner
- Terry cloth rag
- Extra cage liners
- Trash bags
Dish Soap
Choose a mild fragrance free brand without added lotions. Dish formulations specifically target greasy residue without harsh chemicals that damage cage coatings or leave unsafe residues behind. The bubbly suds solution also conveniently runs down vertical bars loosening stuck on debris.
Dilute a small squirt into a couple gallons of hot water for sufficient suds action. Too many soap bubbles make cages slippery and difficult to fully rinse away. Use hot not scalding water to boost soap effectiveness without aggravating your skin washing by hand.
Bucket/Basin
Select a bucket or basin specifically designated for bird-related tasks apart from people’s dishes. Separate utensils prevent inadvertent chemical transfer or food safety issues. Deep enough containers also let cages bars or smaller disassembled components soak submerged to loosen gunk.
New unused buckets work best for bird cleaning projects unless bleach-damaged scratches shelter lingering bacteria. Just ensure any vessel is sturdy enough not to tip from cage frame weight while scrubbing. And never use caustic harsh chemicals stored in the container around birds afterward.
Small Scrub Brush
A durable small bristled scrub brush easily fits between cage wires attacking debris buildup. Look for brushes with sturdy cores prolonging useful life through repeated hardcore scouring. Softer bristles prevent damaging sensitive metal coatings but still scrape effectively.
Replace old tattered brushes regularly before they become useless leaving grime intact. And designate separate brushes just for bird tasks apart from food implements eliminating cross contamination.
Paper Towels
Multi-purpose paper towels swiftly wipe up spills or dry cage pieces between washing and rinsing. Choose durable brands that don’t shred mid task creating stray fibers to clean up after. Paper towels conveniently disposably eliminate lingering moisture and other contaminants hitching rides.
Stock extra rolls solely for bird duties rather than risking household ones harboring harming chemicals transferred by other handlers. Keep them dry until ready to use so available towels don’t integrate stray microbes from damp storage.
Disinfectants
Veterinarian prescribed disinfectants properly sanitize cage surfaces once soap scrubbed. Specific avian formulas ensure thorough germ elimination without toxic residues still compatible with sensitive bird physiologies.
Ask avian vets to recommend a reliable brand they trust for efficacy and safety. And confirm solutions remain their original potency instead of getting old expired bottles losing disinfecting power.
Terry Towels
Absorbent terry cloth hand towels conveniently dry cage bases and bars eliminating lingering moistureInvitation for bacteria takeovers. The fluffy fabrics soak up significantly more dampness than flatweave cloths without snagging metal edges.
Of course separate terries just for cage duties apart from human uses prevents cross contamination issues. And wash towels frequently retaining maximum absorbency cycle after cycle in very hot water.
Cage Liners
Stockpile extra cage liner rolls or bags of preferred substrate choices ensuring fresh clean materials ready every cleaning session. Never reuse soiled papers or pellet litters risking rolled germs back Inside post washing.
Rotate paper, fabric and other liner types to maximize benefits of each while minimizing negatives. Combining substrate strategies enhances drainage and absorption lengthening usable life per change.
Trash Bags
Bird cages generate substantial debris and filth requiring heavy duty trash bags disposal. Double bag soiled paper towels, old cage liners and discarded substrate to contain odors and prevent leaks during removal. Sturdy construction also prevents rips spilling contents across floors to cleanly finish the task.
How to Clean a Bird Cage
Now that you know how often your feathered friend’s enclosure needs freshening up, here is a step-by-step guide walking through the cleaning process:
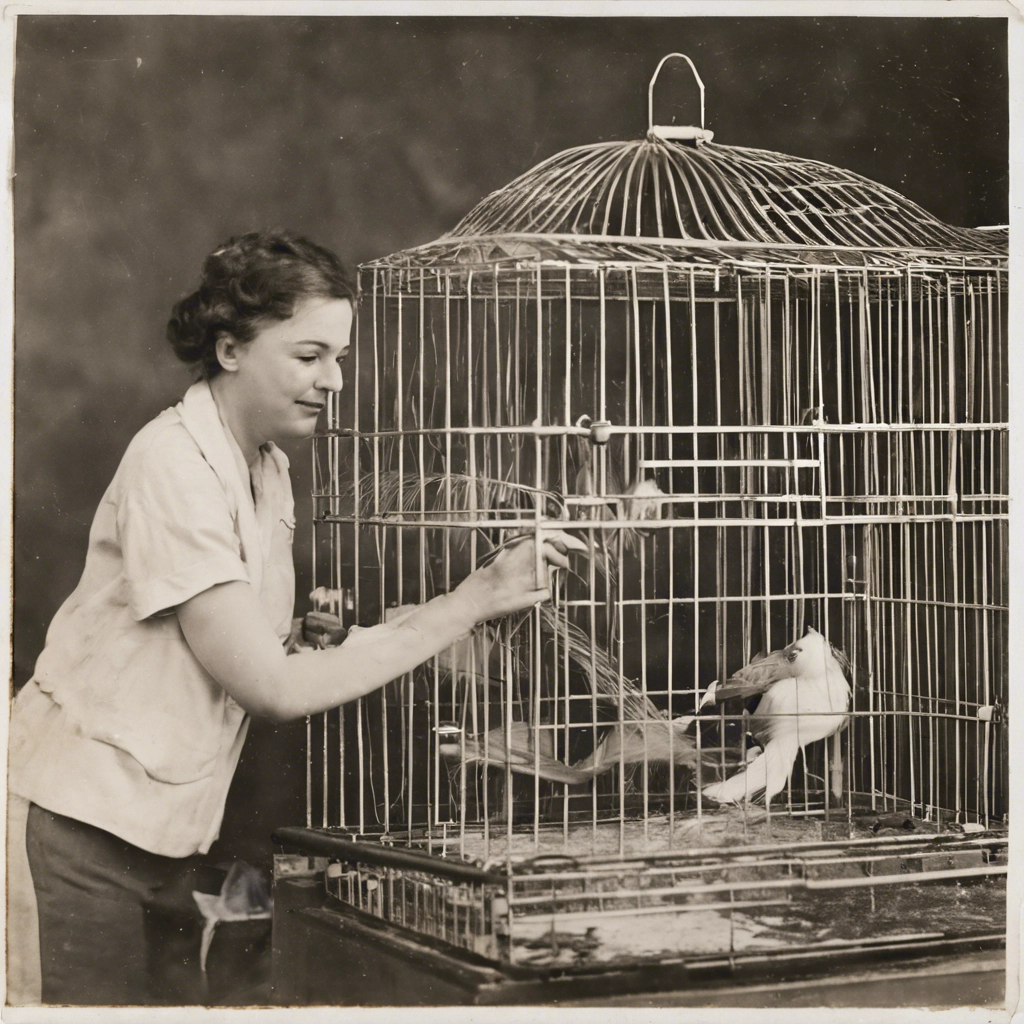
Step 1: Remove All Items
Take everything removable out of the cage. This includes food bowls, perches, toys, substrate, and your bird too. Scrape droppings and debris into trash bags as items come out.
Perch Removal
Wooden and concrete perches grow microscopic fissures sheltering bacteria no amount of surface washing eliminates. Therefore replace porous perches every couple months before hidden germs emerge. Use bamboo or solid steel handles impervious to deep soiling.
Plastic coated concrete perches better resist cracks from gnawing and moisture damage. But constant beak grinding still degrades coatings to eventually reveal unsealed concrete underneath. Frequently rotate more durable all metal textured perches.
Toys
Toys made from straw, wood blocks and shreddable paper strip easily fouled by food bits or moisture. They also readily absorb and transfer germs wedged deep within fibrous pieces impossible to dislodge. Rotate fabric and wood composition toys out more often for metal links and plastic balls.
Regularly sanitizing remaining toys still in use prevents illness carrying particles clinging to surfaces post washing. Dilute sanitizer solution baths kill lingering microbes toys touched between deep cage scrubbings.
Waste Removal
Before removing and replacing any substrate, use designated pet scoops or spoons transferring droppings clumps into trash bags. Flinging old litter loose across rooms risks spreading germs in plumes of organic dust.
Step 2: Wash Removable Pieces
Soak smaller components like food bowls, perches, and cage bars in warm sudsy water. Use a small scrub brush or sponge to gently clean each piece. Rinse thoroughly.
Bowl Scrubbing
Check food bowls closely for scratched nonprofit finish allowing bacteria toeholds. Tiny cracks make proper disinfecting impossible. Replace damaged bowls with sturdy stainless steel versions tolerating years of wear.
Baking soda solutions remove stains from plastic bowels resisting scratches better wash after wash. Make a paste with soda and water targeting stained areas before soaking entirely. The abrasive powder cleans deeply without ruining smooth surfaces.
Rinse and dry bowls thoroughly after scrubbing before returning into service. Leftover soda residues taint future food and water Splashing inside.
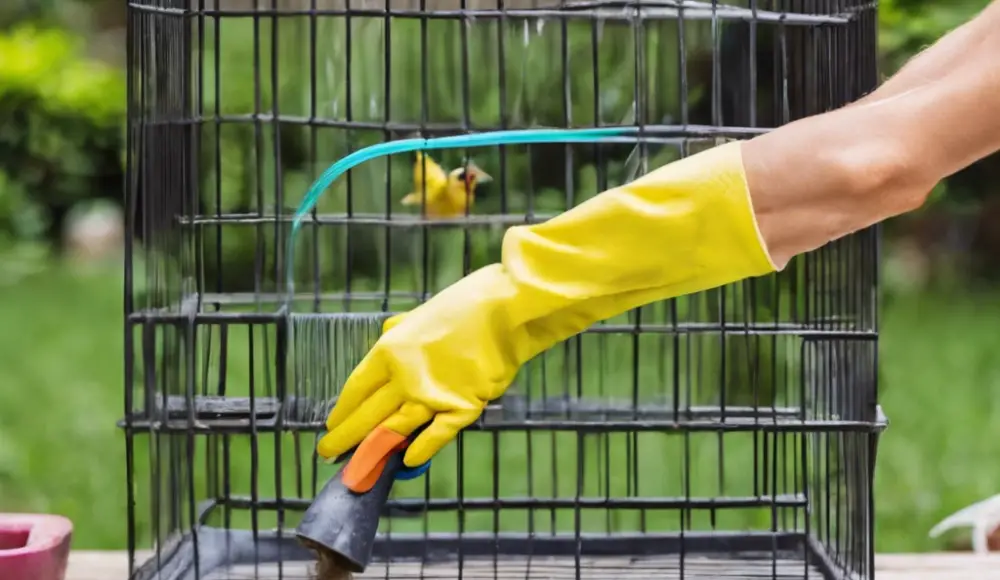
Step 3: Hose Down The Frame
If your cage breaks down for storage or travel, washing the disassembled frame outdoors with a hose is easiest for tackling stuck-on gunk and grime buildup. Use an old toothbrush to scrub tough spots.
Hose Pressure Settings
Adjust hose nozzles to appropriate pressure levels blasting off dried debris without damaging cage construction. Metallic coatings still scratch under intense water streams removing necessary protective layers. Start gentler ramping upward only as needed.
Foaming detergents boost cleaning results when cage gunk resists mere water alone. Apply sudsy formulas onto stuck areas wait several minutes before spraying away grime. Detergents emulsify oils, waste and feather fragments water cannot penetrate alone.
Toothbrush Scrubbing
Make sure toothbrushes used on cages never touch human mouths afterwards. Use separate color coded brushes exclusively for pet functions containing different germs incompatible with people’s digestive systems.
The small brush heads maneuver tight corners and smaller openings effectively loosening caked droppings trapped within seams water jets miss. Concentrated scrubbing also rubs away oxidation and rust building up on bars weakening metal integrity without total cage submersion.
Step 4: Disinfect The Cage
Spray down the entire reassembled cage frame with an avian-safe disinfectant cleaner. Ensure you coat all bars, platforms, corners and crevices. Allow the disinfectant to sit for 5-10 minutes before the next step.
Application Techniques
Spray disinfectants use efficient fine tip nozzles targeting every surface crevice and gap grime lingers inside. High pressure streams physically dislodge particles other cleaning steps loosen but cannot fully remove alone.
Bottles allow measured applications conserving expensive cleaner costing more than typical household formulas. Uniform coatings prevent missing patches allowing bacteria survival behind walls or underneath platform joints.
Power sprayers work faster covering expansive flight cage territories efficiently. Constant pressurized streams powerfully blast microscopic waste free without exhausting hands pumping manual trigger bottles. Just confirm chosen power sprayers specify avian safe.
Contact Time
Allowing disinfectants adequate contact time ensures formulations penetrate fully not just superficially across cage terrain. Active ingredients requiring several minutes soften substances water and brushes couldn’t dissolve alone given visible grime removal.
Setting timers prevents accidentally rinsing solutions off prematurely. Ten full minutes gives cleaners the opportunity to meet maximum germ killing potential before flushing away. Patience pays off for complete hygiene restoration.
Drying
Certain disinfectant properties linger only while still wet banning early blotting or wiping. Other antimicrobial cleaner efficacy depends on air drying keeping active sterilization ongoing longer as moisture evaporates.
Know specific product instructions before attempting tospeed dry cages after spraying. Otherwise diminished disinfectant results waste cleaning efforts and money. Repeat applications likely necessary from skipping essential activity windows.
Step 5: Rinse The Cage
Rinse every inch of cage with clean running water to flush away disinfectant residue. Residues left behind can harm your bird when they climb around the bars. Pay special attention to giving food bowls a thorough final rinse.
Water Temperature
Warm water best ensures residue removal over cold lacking oomph breaking down cleaner traces. Hot temperatures both damage coatings and burn handler skin risking injury hauling bulky cages. Stick around 100 degrees Fahrenheit striking the best balance.
Nozzle Adjustments
Switch spray nozzles over to strongest jet settings blasting away clinging foam bubbles or pooled solutions. Narrow streams concentrate pressure intensity drilling down stubborn clumps requiring maximum intensity conquering.
Bowl Rinsing
Position food bowls with drainage holes or smooth sloped interiors allowing water quick escape preventing interior puddling. Then situate objects upside down drying faster post scrubbing without trapping moisture spreading future bacteria.
Step 6: Let Air Dry
Allow the cage frame, food bowls, and accessories to completely air dry before moving onto the next step. Do not try wiping anything down with towels. Remaining moisture encourages mold and bacteria growth.
Drying Locations
Move cages into direct sunlight or utilise fans speeding evaporation when waiting long hours air drying seems unreasonable. Just ensure fans blow clean filtered air instead of kicking ground dust upwards onto freshly cleaned cages.
Position bowels and cages bottoms up preventing water pooling inside crevices out of sight gradually seeping larger contained spaces. Tilted cages drip dry much faster as gravity pulls moisture downward escaping frame corners.
Step 7: Add Fresh Substrate
Line cleaned cage bottoms with new paper cage liners, corn cob granules, pelleted paper or other fresh substrates. Now you can add back perches, food bowls and toys.
Substrate Rotation
Alternate paper pellet layers with recycled cardboard strips or fabric heterogeneous mixture across cage floors. Varying materials brings different positive capabilities improving moisture absorption and durable cushion.
The diversity also cuts costs using smaller amounts any single substance requiring frequent replacement. Mixes expand useful lifespans between changes whenever certain sections remain visibly clean and dry.
Perch Positioning
Reinstall perches in new arrangements keeping use even and preventing overcrowding. Clumping everything together squeezes activity into tiny areas accelerated soiling build ups underneath.
Reposition water and food containers closer towards cage fronts improving visibility. Placing essentials along back walls obstructs line of sight gauging remaining contents. Birds cannot vocalize needs once resources empty out of view.
Step 8: Return Your Bird
Lastly, put your freshly bathed bird back into their gleaming clean cage. Some light misting with purified water rehydrates feathers after drying cleaning agents.
Reacclimation Periods
Initially opening cage doors, allow birds adjusting periods before forcing reentry. Anxious birds may balk approaching entirely foreign scented territories despite familiar furnishings inside. Squeezing inside right away risks panicking birds thrashing around undoing cleaning efforts.
Lightly misting reintroduced birds’ feathers provides additional reassuring scent cues indicating possessions waiting safely for homecoming. The comfort of familiar damp feathers eases transition back indoors over jarring sterile cage smells.
Take reacclimation slowly without anxiety for either party. Right after deeply cleaning cages essentially means welcoming birds back into a new environment. Therefore, be patience respecting comfort levels rising slowly with positive encouragement.
FAQ About Bird Cage Cleaning
To wrap up this article guide on ideal bird cage cleaning routines, below are answers to some frequently asked questions:
What cleaning products are safe for bird cages?
Use fragrance-free dish soaps without added lotions. Avoid harsh bleach solutions. Opt for avian-approved disinfectant cleaners instead.
How do I eliminate odors in a bird cage?
White distilled vinegar breaks down waste particles that cause foul odors. Create a 50/50 vinegar and water solution in a spray bottle. Lightly mist cage bars and perches then let solution sit 5 minutes before rinsing.
Can newspapers be used to line bird cages?
No. Ink from newsprint is highly toxic. The filmy residue left behind transfers to birds’ feet as they walk around. Instead use unprinted paper cage liners or pelleted paper materials.
Should I clean bird cages outside?
Absolutely. As long as outdoor temperatures are sufficiently warm, haul cages outside for cleaning. Outdoor ventilation prevents inhaling dust, dander and cleaning fumes that aggravate allergies or asthma.
How can I sanitize bird toys between cage washings?
Pull toys like wood blocks, bells and mirrors out daily. Mix 1 tablespoon of bleach into 1 gallon of water. Submerge toys 10 minutes, scrub clean, rinse and air dry. Adding regular toy rotation also helps. Replace toys birds lose interest in to refresh the cage.
And there you have it! Arm yourself with this complete guide to bird cage cleaning including exactly how often washing needs to happen based on cage factors, what supplies to have on hand, detailed scrubbing steps and commonly asked questions. Maintaining cleanliness keeps birds happy while reducing health risks.

My name is Shane Warren, the author behind Your Bird Buddy – your ultimate guide to the wonderful world of birds! Unleash your inner avian explorer as we delve into a vibrant library of knowledge dedicated to all things feathered. From learning about diverse bird species from across the globe to understanding their captivating habitats and behaviors, I’m here to fuel your passion for these magnificent creatures. Not only that, but I also provide valuable insights on being a responsible and informed pet bird owner. Join our vibrant community and let’s celebrate the feathered wonders of the world together – one chirp at a time. And be sure to join our Your Bird Buddy Community over on Facebook!
Comments are closed