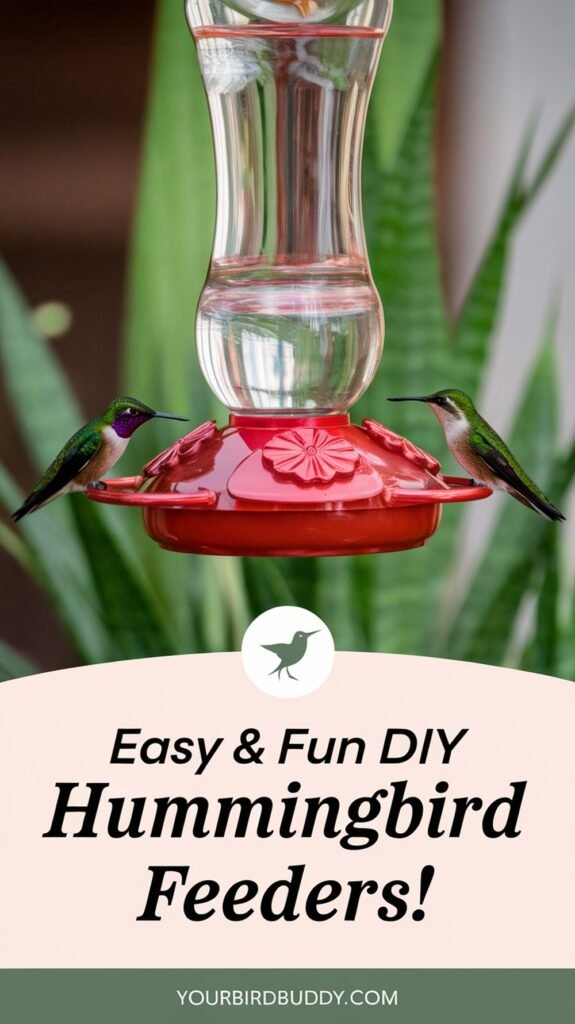
Creating your own bird feeders can be a rewarding and creative project. It’s a great way to bring nature closer to your home while enjoying the beauty of hummingbirds. Using household items, you can craft unique and functional feeders that are both cost-effective and eco-friendly.
☕ The Perfect Mug for Every Bird Lover
Start your morning right with a bird-themed mug that makes you smile.
🛒 Shop Bird Lover Mugs on Etsy 🛒 Shop Bird Lover Mugs on Etsy


This article explores three innovative designs: repurposed plastic cups, upcycled chandeliers, and wine bottle conversions. These projects not only save money but also allow for personal customization. Adding red elements, like paint or ribbons, can make your feeder more appealing to hummingbirds.
Maintenance is key to keeping your feeder effective. Regular cleaning and fresh nectar ensure a healthy environment for visiting birds. With a little creativity and effort, you can create a welcoming space for these tiny visitors.
Key Takeaways
- Homemade feeders are cost-effective and eco-friendly.
- Repurposed items like plastic cups and wine bottles make great feeders.
- Red elements attract hummingbirds more effectively.
- Regular cleaning and fresh nectar are essential for maintenance.
- Customization allows for unique and personalized designs.
Why Create Your Own Hummingbird Feeder?
Love Birds? Shop Our Etsy Store!
Faith-filled bird shirts, mugs & gifts — beautifully printed & shipped fast. 122+ designs, 5-star rated.
🛒 Shop YourBirdBuddyShop on EtsyCrafting your own bird feeder offers a unique blend of creativity and practicality. It’s a project that not only saves money but also allows you to design something truly one-of-a-kind for your backyard.

Cost-Effective and Customizable
One of the biggest advantages of making your own feeder is the cost savings. For example, a homemade hummingbird feeder made from a repurposed plastic cup can cost as little as 10 cents, while a chandelier feeder crafted from Habitat Restore finds might only set you back $10. Compare this to commercial feeders, which often cost $40 or more.
Beyond affordability, these projects offer endless customization options. You can paint your feeder red to attract more birds or add vinyl decorations for a personal touch. This creative freedom makes each feeder unique and tailored to your style.
The Joy of Handmade Bird Attraction
Building a feeder yourself isn’t just about saving money—it’s also deeply rewarding. Many people find joy in the process, whether it’s bonding with family during the project or feeling a sense of accomplishment when birds visit.
Upcycling materials like plastic cups, wine bottles, or baby food jars adds an eco-friendly dimension to your project. This approach not only reduces waste but also supports a healthier ecosystem.
Finally, there’s the emotional satisfaction of contributing to the well-being of these tiny creatures. Knowing you’ve provided a reliable food source, especially during migration, adds a meaningful layer to your efforts.
DIY Hummingbird Feeders: Easy Crafts to Attract Tiny Jewels
Transforming everyday items into functional bird feeders is both fun and eco-friendly. Below, we explore three innovative designs that are simple to create and highly effective.
Repurposed Plastic Cup Feeder
Start by cleaning a plastic cup with nail polish remover to remove any residue. Use E6000 glue to seal the edges and create a repurposed plastic cup feeder. Adapt a bendable straw to serve as the feeding tube, ensuring it fits snugly into a small hole drilled into the cup.
For decoration, consider using red spray paint or holographic vinyl to make the feeder more appealing. Add rhinestone flowers for a touch of elegance. This project is quick, taking only about 20 minutes to complete.

Upcycled Chandelier Feeder
An upcycled chandelier feeder adds a touch of elegance to your backyard. Source an old chandelier from Habitat for Humanity’s Restore for $10. Remove old hardware, clean it thoroughly, and spray paint it in a color of your choice. Allow it to dry for 48 hours.
Replace the bulb holders with baby food jars, securing them with hot glue and velcro. Install ant moats to keep pests away. Add yellow rhinestone jewels to attract more birds.
Wine Bottle Feeder with a Twist
A wine bottle feeder is both stylish and functional. Drill a small hole into the cork and insert copper wire to hang the bottle. Use a vacuum seal technique to ensure the nectar stays fresh.
Decorate the bottle with red accents or holographic vinyl for added appeal. This design is perfect for those who want a unique and eye-catching feeder. For more tips on creating effective feeders, check out this guide.
Simple Steps to Make a Mason Jar Hummingbird Feeder
Building a mason jar feeder is a simple and rewarding project for bird enthusiasts. This guide walks you through the process, from gathering materials to adding decorative touches. With a few basic tools and creativity, you can create a functional and attractive feeder.
Gathering Your Materials
Start by collecting the essentials: a mason jar, a lid, bendable straws, and pliers. You’ll also need E6000 glue for waterproof sealing and a red plastic insert to attract birds. A hanging chain or galvanized wire completes the setup.
Assembling the Feeder
Drill a small hole in the lid to fit the feeder tube. Secure the bendable straw with E6000 glue to prevent leaks. Attach the red plastic insert to the lid for added appeal. Fill the jar with sugar water (1 part sugar to 4 parts water) and screw the lid on tightly.

Decorating for Maximum Appeal
Add red ribbon accents or hand-painted flowers to make the feeder more inviting. Bright colors, especially red, are highly effective at drawing birds. Use bead chains or galvanized wire for a secure and stylish hanging mechanism.
Essential Tips for Maintaining Your Hummingbird Feeder
Proper maintenance ensures your feeder remains a reliable food source for visiting birds. Regular cleaning and timely nectar replacement are key to preventing mold and spoilage, ensuring a healthy environment for your feathered friends.

Cleaning Frequency and Methods
Clean your feeder at least once a week, and more often in hot weather. Use a dishwasher if the feeder is dishwasher-safe, or soak it in soapy water and scrub with a bottle brush and toothbrush. For deep cleaning, a weak vinegar or bleach solution works well to sanitize the feeder.
Different feeder shapes may require specific brushes. For example, bottle feeders need long, narrow brushes, while cup feeders can be cleaned with smaller tools. Always rinse thoroughly to remove any cleaning residue.
How Often to Refresh Nectar
Change the sugar water every few days during cool weather and daily when temperatures exceed 93°F. Signs of spoilage, like cloudy nectar or floaters, indicate it’s time for a refresh. Position feeders in dappled shade to help keep nectar fresh longer.
In humid climates, increase the cleaning frequency to prevent mold growth. During winter, reduce the schedule or remove feeders entirely if birds are less active.
- Clean feeders weekly, more often in hot weather.
- Use vinegar or bleach solutions for sanitizing.
- Change nectar every few days, daily in high heat.
- Watch for spoilage signs like cloudiness or floaters.
- Adjust maintenance routines for regional climates.
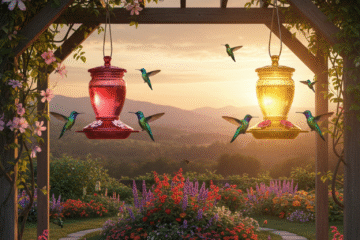
Best Practices for Attracting Hummingbirds
To create a welcoming environment for these vibrant birds, focus on strategic placement and natural attractants. Proper positioning and thoughtful design can make your space irresistible to hummingbirds.
Ideal Feeder Placement
Place feeders 4-6 feet above the ground, near small branches or twigs for perching. This height provides safety from predators while offering easy access for the birds. Keep feeders in shaded areas, like under porches, to prevent nectar from spoiling quickly.
Position feeders away from cat-friendly perches to protect hummingbirds from predators. Multiple feeders should be hung out of sight of each other to reduce competition among birds.

Using Colors and Flowers to Draw Them In
Hummingbirds are naturally drawn to red and orange. Use feeders with red parts or add red ribbons and tape around railings as decoys. These vibrant colors mimic the flowers they love.
Plant native nectar-rich flowers like bee balm and columbine to provide a consistent food source. Companion planting with continuous bloomers ensures hummingbirds always have access to nectar.
Add an ant moat filled with water to keep pests away from your feeder. This simple addition protects the nectar and keeps it fresh for longer.
- Hang feeders at 4-6 feet for safety and accessibility.
- Use red accents to attract hummingbirds effectively.
- Plant native flowers like bee balm for a natural nectar source.
- Install ant moats to prevent pests.
- Space multiple feeders to reduce competition.
Conclusion
Creating your own bird feeders is a rewarding way to connect with nature while saving money. Starting with a simple plastic cup feeder is an excellent introduction to this project. It’s quick, affordable, and allows for creative expression.
Regular maintenance, like cleaning with mild dish soap and hot water, ensures a healthy environment for visiting birds. As your skills grow, consider progressing to more complex designs, such as chandelier-style feeders, to enhance your garden’s appeal.
As Melissa wisely said, “Life is an adventure, and I’m here to enjoy every moment of it!” This sentiment reflects the joy of crafting something meaningful for nature. Share your completed projects online to inspire others and connect with a community of bird enthusiasts.
For more tips on creating the perfect nectar blend, check out this guide. Happy crafting!
Enjoyed this post? Browse our Etsy shop!
Bird shirts, mugs & faith apparel · 122+ designs · ★★★★★ 5.0

0 Comments